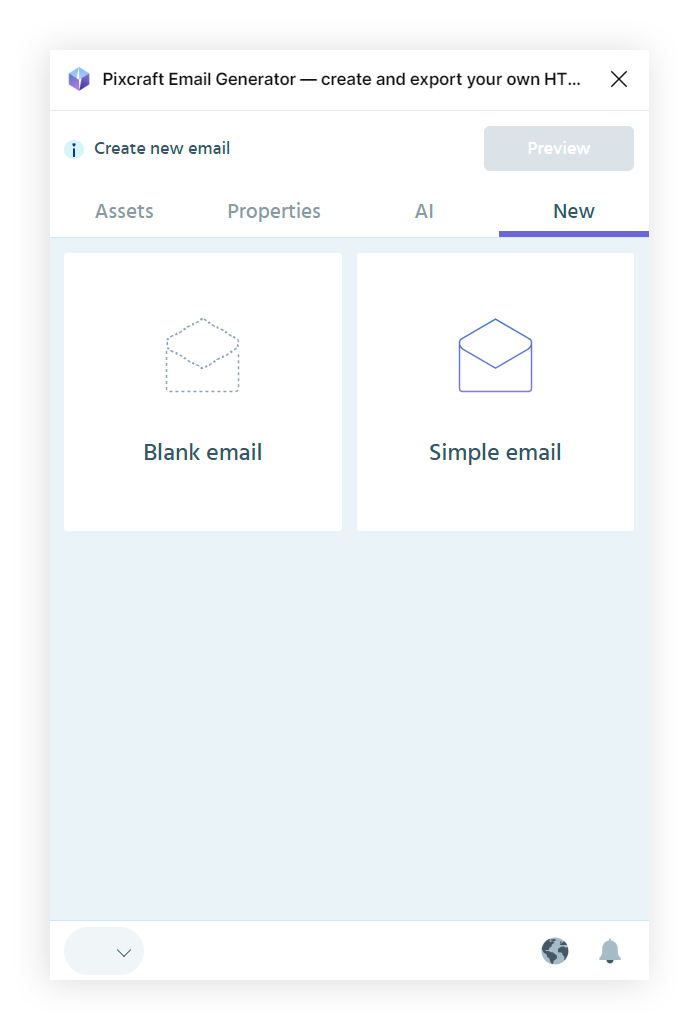
Getting started
To start working with Pixcraft, you need to create a frame with Auto Layout. You can do this manually or use ready-made templates for greater convenience.
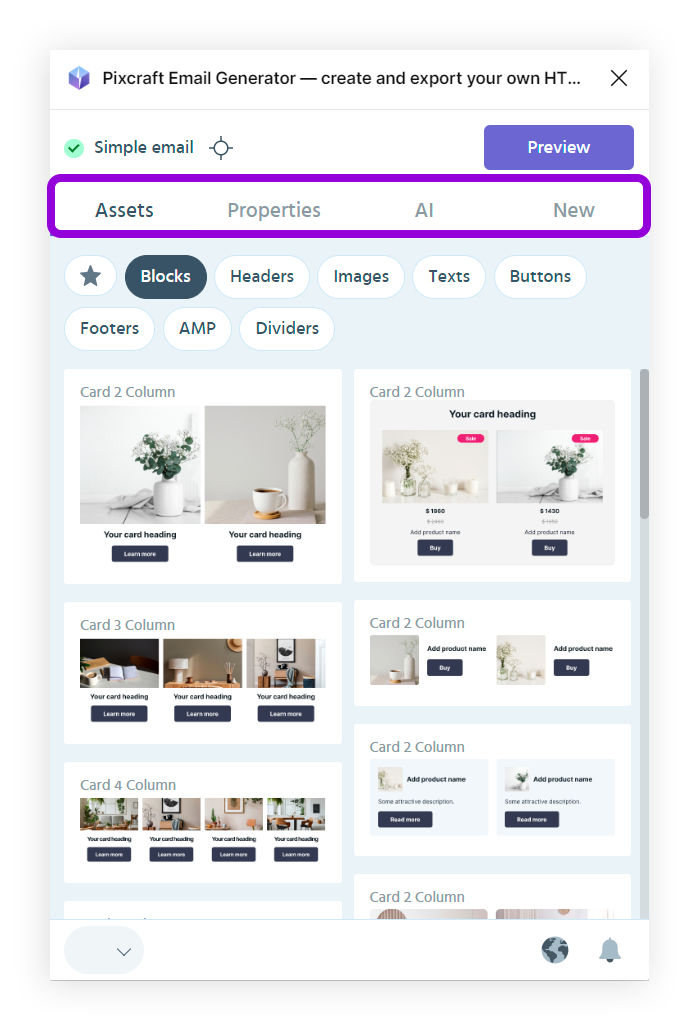
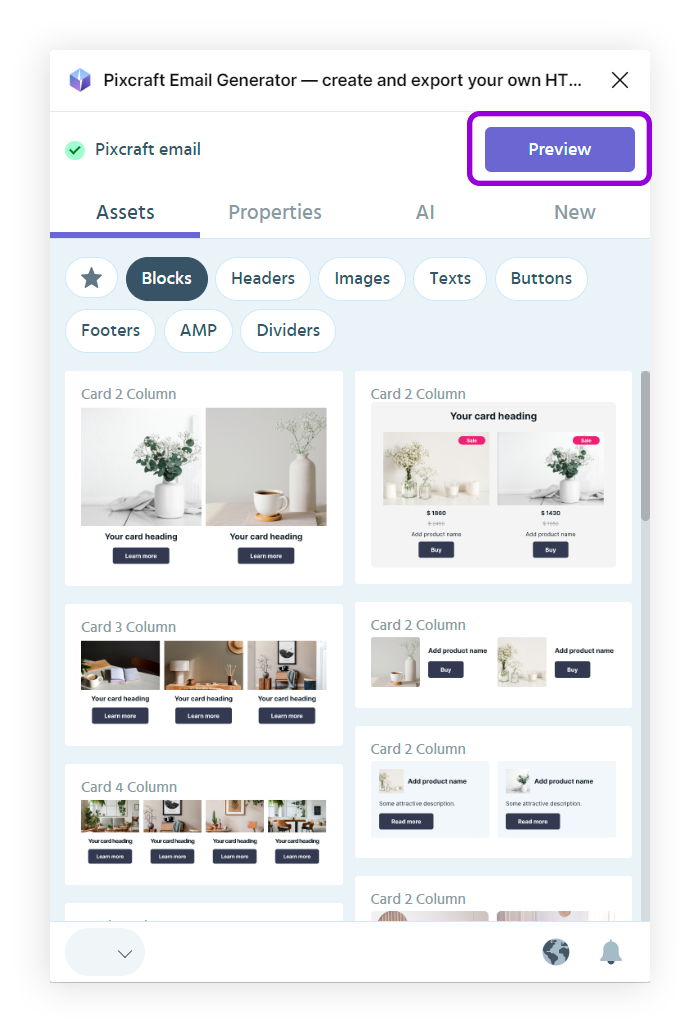
Assets
To add content to the email template, select the corresponding assets in the library. Plugin assets are grouped by category: Block, Header, Image, Text, CTA, Footer, AMP, and Divider. Place the assets in the desired location. You can create an email in just a few clicks by simply changing texts and images.
Customization
Using Figma's settings, customize the added assets to make them look the way you want.
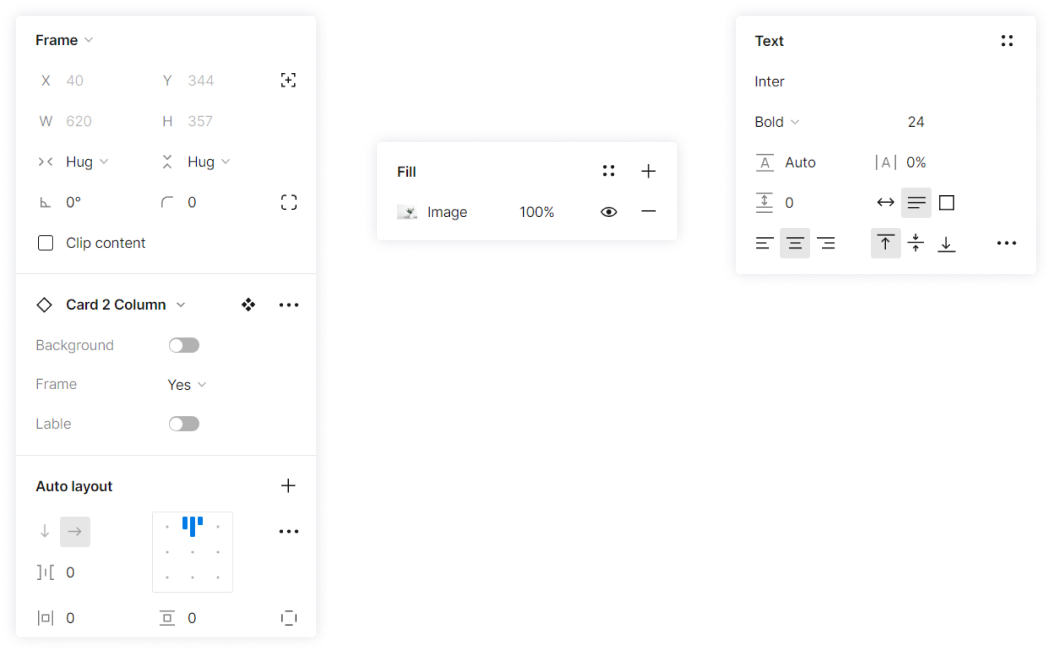
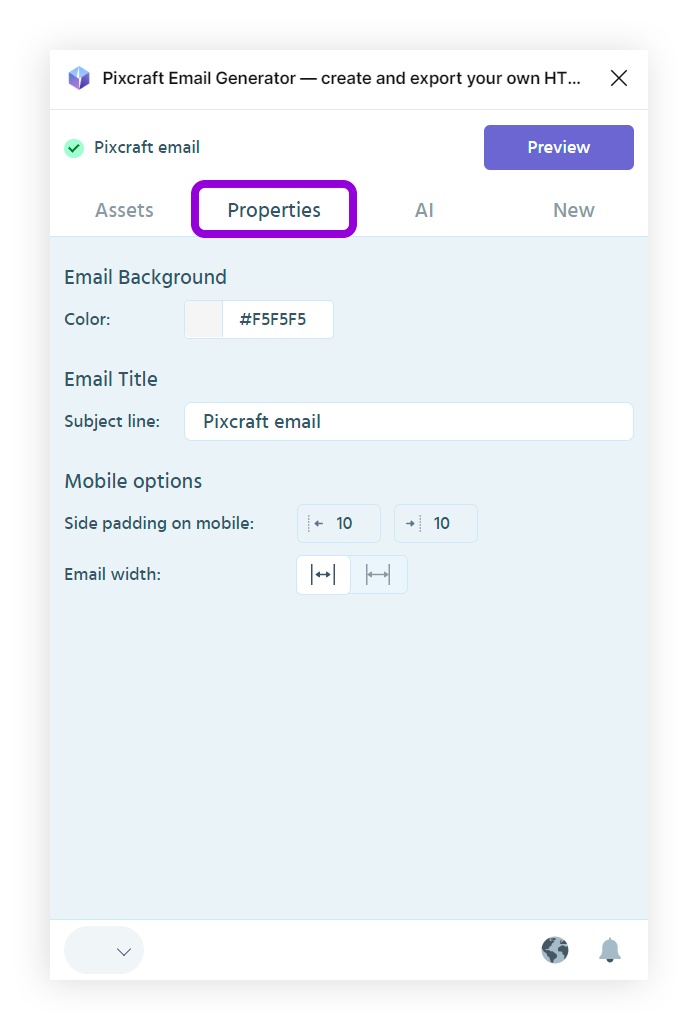
Setting up assets
Change the properties of assets and the blocks within them to suit your needs.
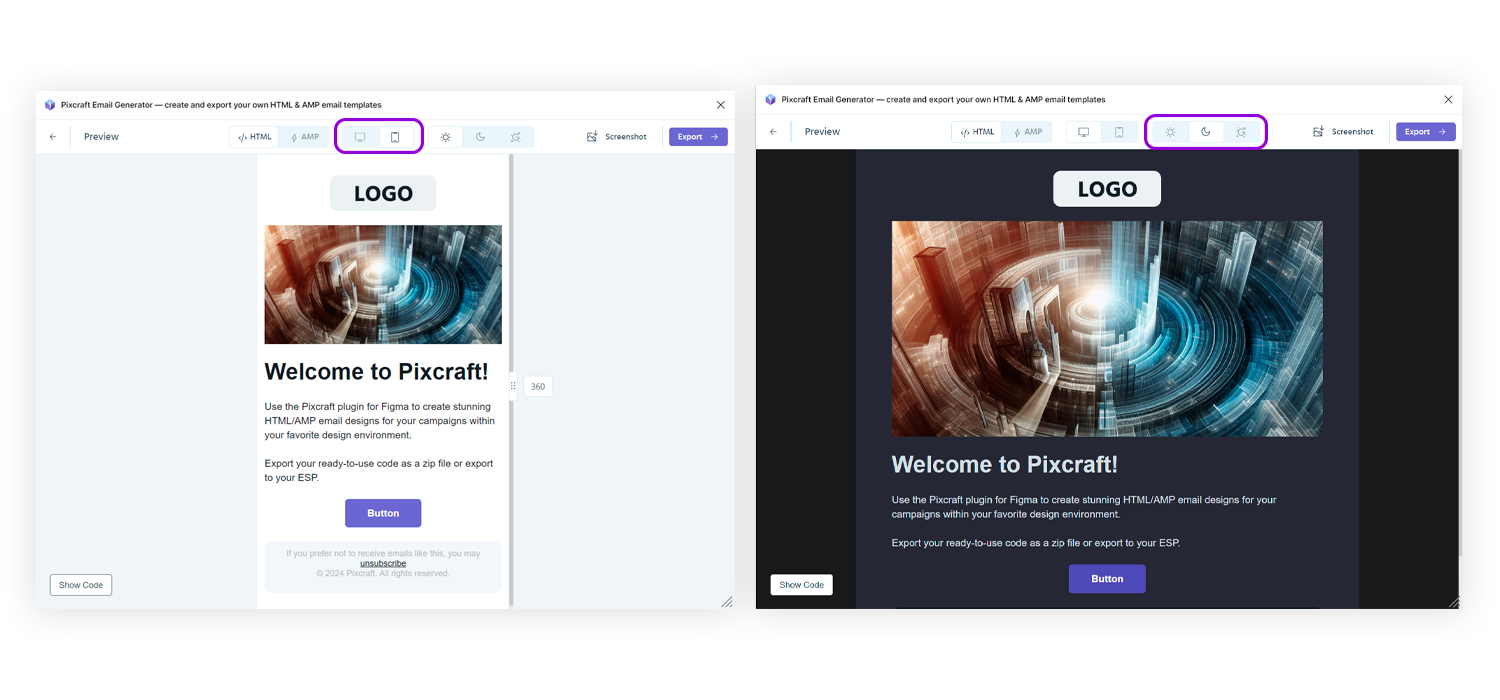
Preview
To get the layout of the letter, click the “Preview” button at the top of the Pixcraft window.
Checking the result
Once rendering is complete, you can check whether the layout of your email has been rendered correctly, see how it looks in dark mode, and observe how the email responds to changes in screen size.
Email from scratch
Alternatively, you can create your own email by following Figma's Auto Layout guidelines. When you're done editing, open the Pixcraft plugin, select your email frame, and click the Preview button.
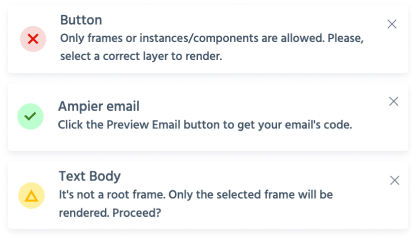
Status message
The Pixcraft plugin for Figma only works with auto-layout frames. The plugin will show you a warning message if something goes wrong.
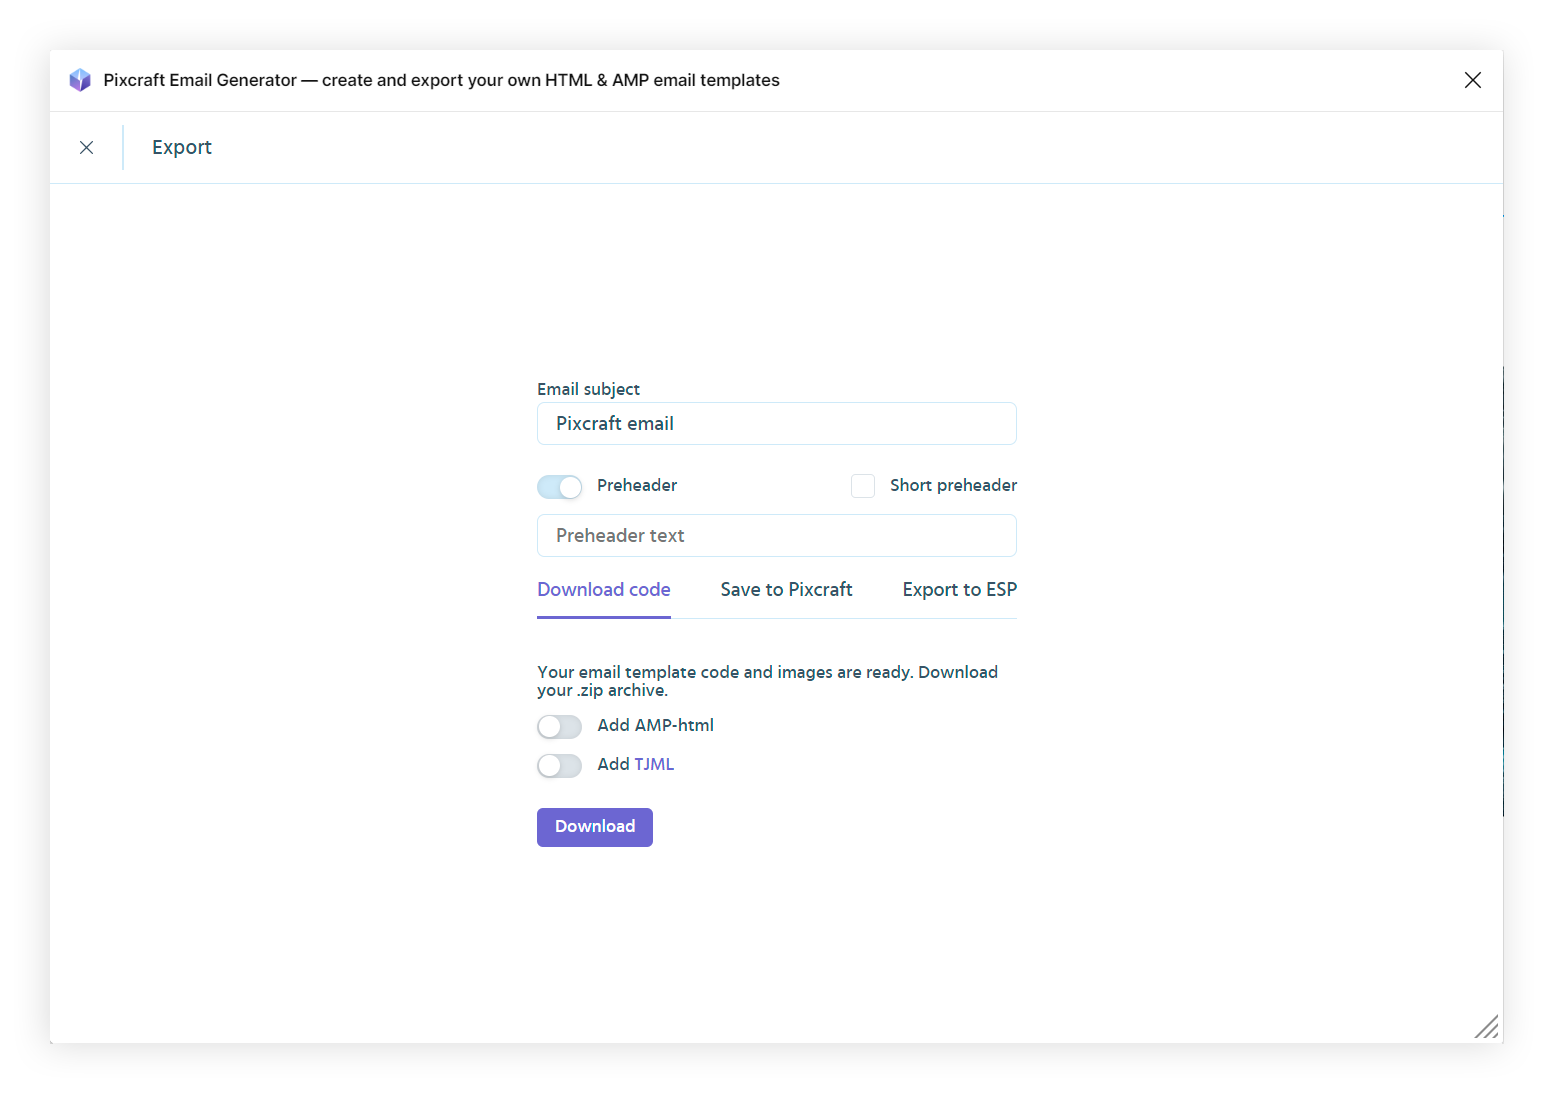
Export HTML
To save the email, you need to click on the Export button and choose the export method in the subsequent window:
Download HTML/AMP code to your computer as an archive
Save to your Pixcraft account
Export to your ESP